
Escalating Requests
There may be occasions when it is necessary to escalate a request from one manager to another for approval.
Individual Leave requests may be escalated on the request itself using the Forward Leave button.
This can also be done in bulk through Admin > Requests where Timesheets and Expense requests can also be escalated.
- Open the Admin menu
- Select Requests
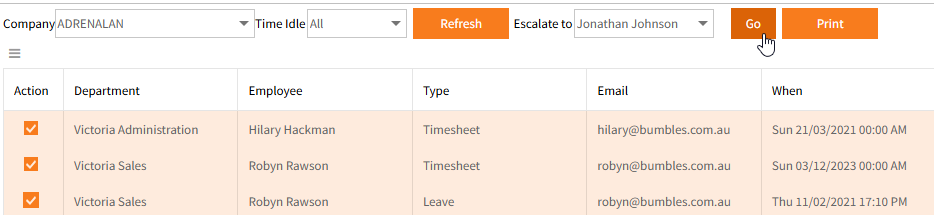
- If necessary, change Time Idle from All to an appropriate number of days from the drop-down list, then click Refresh
- From the display of request entries, tick the box in the Action column on the left of the relevant entry to be escalated - multiple entries can be selected if required
- Click the Escalate to drop down arrow.

- Select the appropriate name and click Go
- A Summary window is displayed, showing what entries you are escalating and who they are being escalated to.
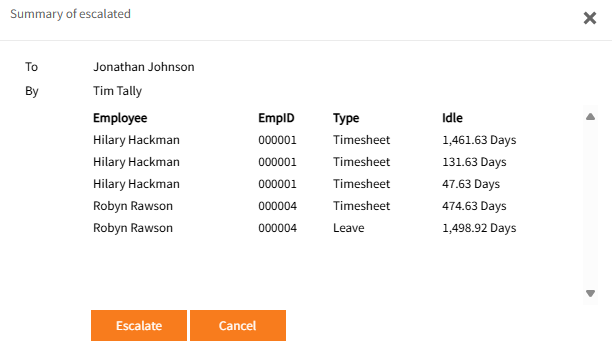
- Click Escalate. An email is sent to the new approver, with the details of the escalation.
- The leave request is displayed in My Team > Team Leave Requests > Escalated Leave ready for approval. View Team Leave Requests for further information.
- The timesheet is displayed in TimeSheet > Escalated Timesheets ready for approval.
- Expense request's can be accessed from MyTeam > Team Expenses > Escalated Requests.
Depending on configuration of the Group Security it may also be available in Expense Details > My Expenses > Escalated Requests.
Escalation Tasks
When the new approver logs in to Employee Self-Service Kiosk, the escalation will appear in Employee Tasks and also added to the Action Items count on the Dashboard.

Clicking on either the Task or the Action Item will redirect the user to the Tasks & Action Items page in Employee Details.
The task may then be opened by clicking the edit icon in the Action column: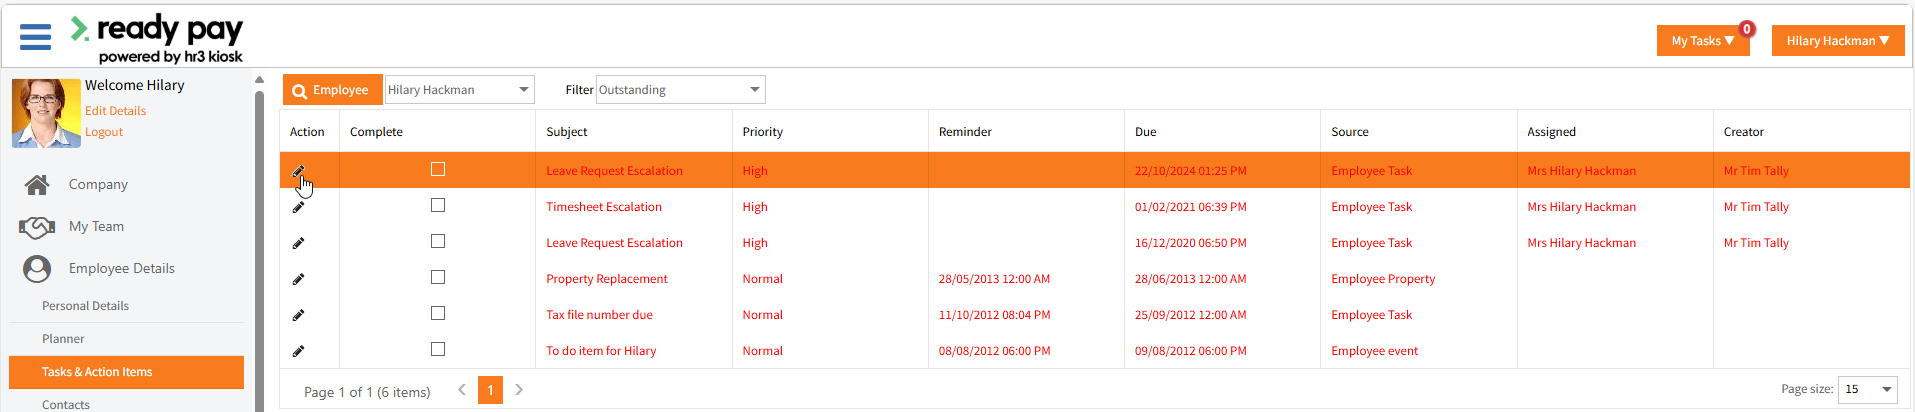

If required, see Action Item Tasks for more information on Tasks.
Return to Main Menu