
Employee Self-Service Kiosk Access and Security
Activating Employee Ready Pay Employee Self-Service Kiosk Access (no workflows)
This page guides you through activating an employee so their details can be viewed in Employee Self-Service Kiosk and they can access Employee Self-Service Kiosk:
- Open Ready Pay
- Search for the relevant employee using F3 search or the Employee lister on the right and open their file
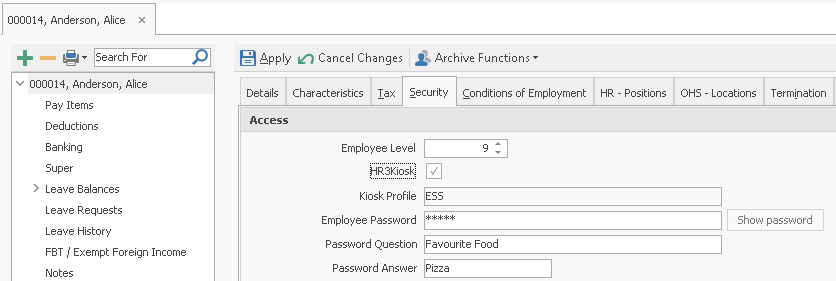
- On the first screen, select the Security tab
- Tick the HR3Employee Self-Service Kiosk checkbox
- Type in the Employee Password if required.
This will depend on the use of Single Sign-On which is documented in the Employee Self-Service Kiosk Setup Guideyour IT staff may be able to assist further with this. - The Password Question and Answer fields are optional.
They are available to verify the validity of an employee who has forgotten their password if they contact the Payroll office. - Once the process is completed in Ready Pay, set up the User Security in Employee Self-Service Kiosk Admin, via Users and Groups.
Linking Employees to Employee Self-Service Kiosk Security
The final step before an employee can log in to the Employee Self-Service Kiosk is to link them to a group.
This is a very important step as it affects the security of the system. Only those who have Administrator access, or who have appropriate Employee Self-Service Kiosk permissions, are able to perform this task.
- In Employee Self-Service Kiosk, go to Admin > Groups to display all the security groups available in Employee Self-Service Kiosk.

- Choose the Group to which the employee should be added - click on the group name, e.g. ESS
The system will display the details for the group you selected.
It also displays all the employees from Ready Pay in alphabetical segments.
The users who are part of this group will have a tick in the Assigned check box.
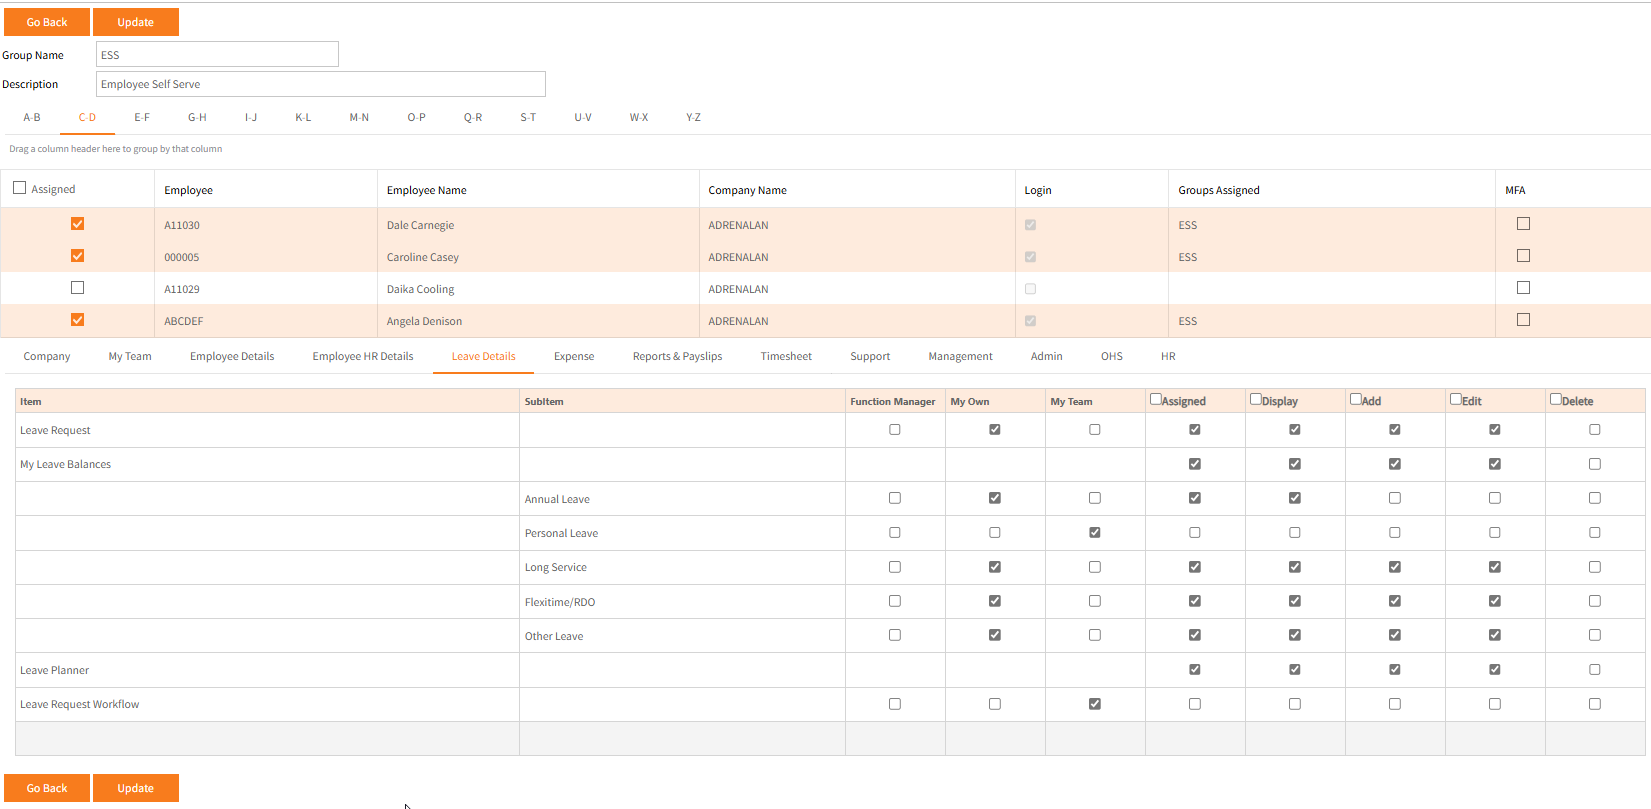
- Within the alphabetical tabs, locate the employee you are adding to this group, and tick the Assigned check box.
- Click Update to save the changes, or click Go Back to cancel the changes and return to the Group selector screen.
If an employee needs to be assigned to a different group, follow steps 1 to 4 for the current group they are in, and untick the Assigned check box for the employee.
Repeat steps 1 to 4 again to assign the new group.
See Checking/Changing User Security for further information.
Note: the Workflows section at the bottom of this page is NOT applicable to your system if you are using Automated Workflows (aw). This section only applies to those using Legacy Workflows, not aw.
Legacy Workflows
If your system does not have Automated Workflows (aw)activated, it will instead utilise Legacy Workflows.
In this case, there is an additional consideration for activating employee access to Employee Self-Service Kiosk.
This procedure requires all the steps covered previously (at the top of this page) for 'no workflows' activation, plus the following:
- In the Workflows section, for each of the workflow categories, select the appropriate Approver Type.
- If you choose 'Department' or 'Immediate', there is nothing more to do.
- If you choose 'Designated' or 'Position' then you must complete the section to the right of this option, nominating the Approver or Position.
- See Approver Types for more information on this topic.
